Anatomy of data node failures in Elasticsearch p. 2
In the previous article from the series about Elasticsearch clustering, we discussed the structure of data nodes responsible for storing the indices and indexed documents. Today we are going to use this knowledge to understand, what happens during the data node failures and planned restarts. We will also talk about possible mistakes that may lead to a data loss during restarts.
tl;dr;
Elasticsearch treats node disappearance as a failure by default, and takes costly repair actions. To perform a planned node restart, you need to follow the procedure from the documentation.
Case 1: data node failure
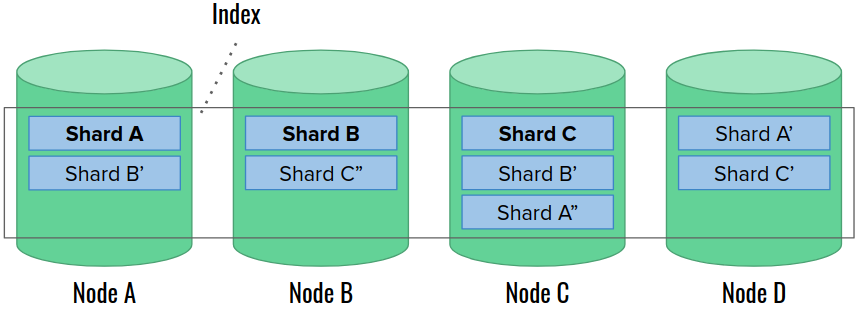
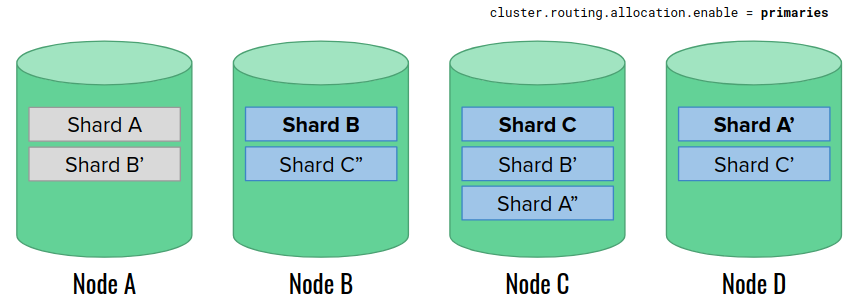
Let’s begin with a typical failure, where one of the data nodes suddenly disappears. This is the classic situation which Elasticsearch was designed for. In the example, let’s say that we have:
- 4 data nodes
- 1 index with 3 shards, and each shard with 2 extra replicas
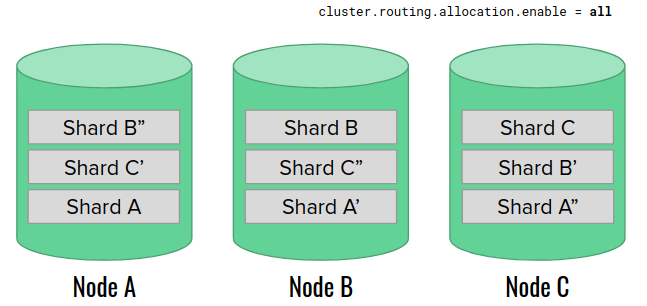
This is the illustration of the initial state before the data node failure:
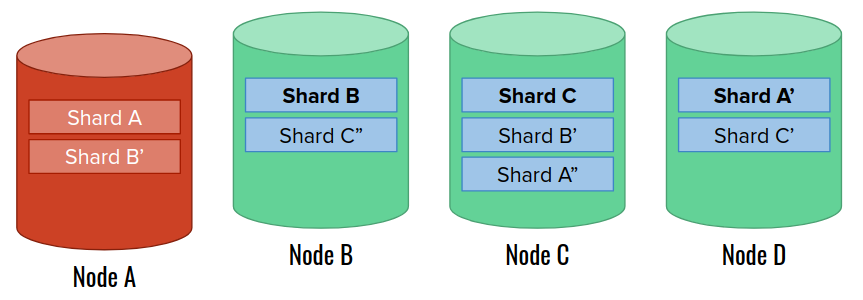
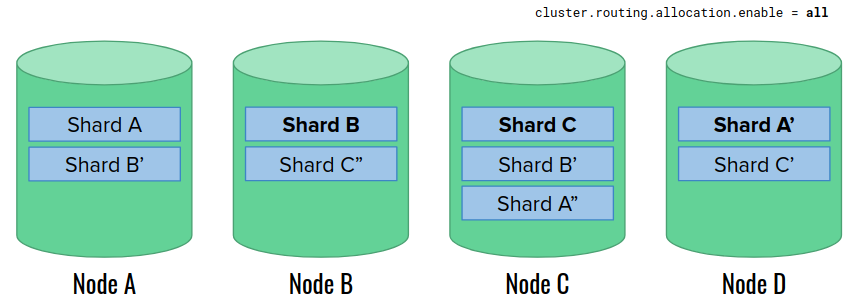
Let’s now say that node A crashes and disappears from the cluster. Elasticsearch responds with promoting a new primary shard A out of the remaining replicas. Then, it waits for 1 minute by default, before executing any further steps. This is to prevent costly recovery actions for short, transient failures, such as network issues. We can configure the wait time with index.unassigned.node_left.delayed_timeout cluster setting).
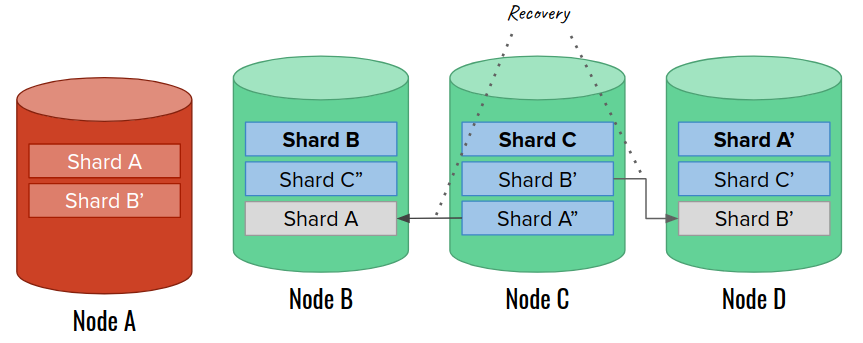
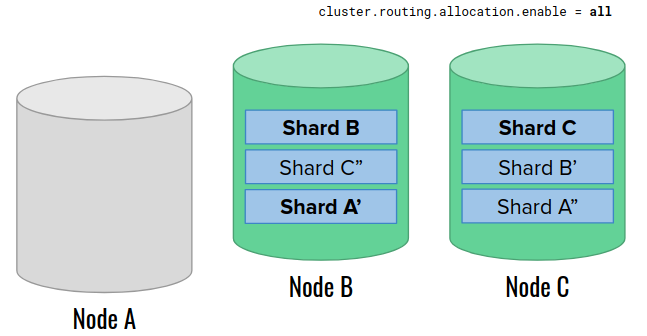
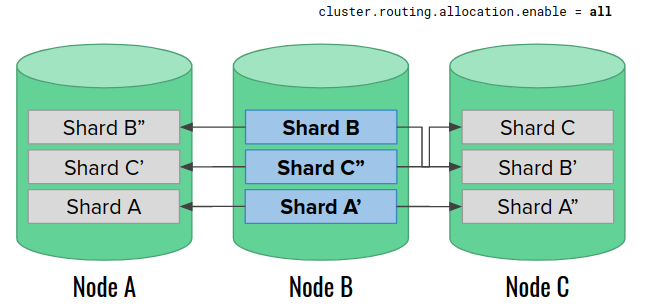
One minute passes, but node A does not join the cluster. Now Elasticsearch can start the actual recovery process. The first thing is allocating new replica shards to replace the lost ones. We remember that two copies of the same shard cannot land on the same node. Fortunately, we have enough data nodes in our cluster to continue. Note that the recovery itself can take a while for large shards:
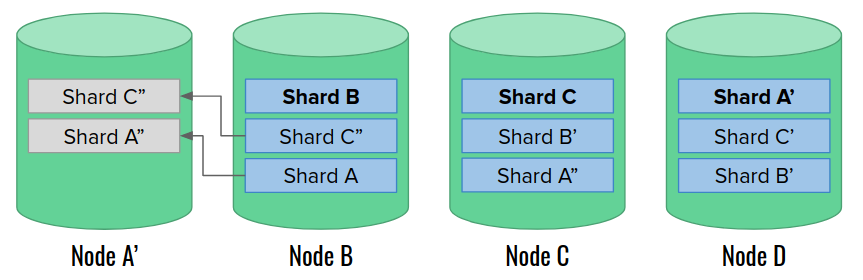
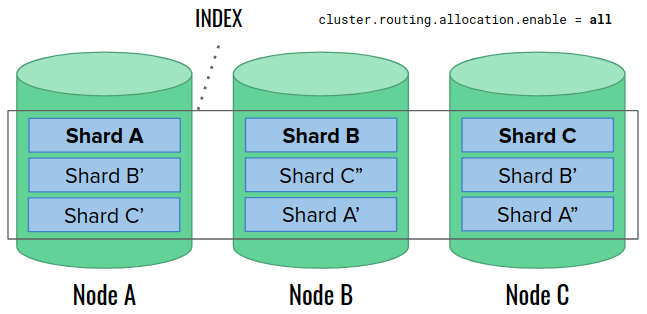
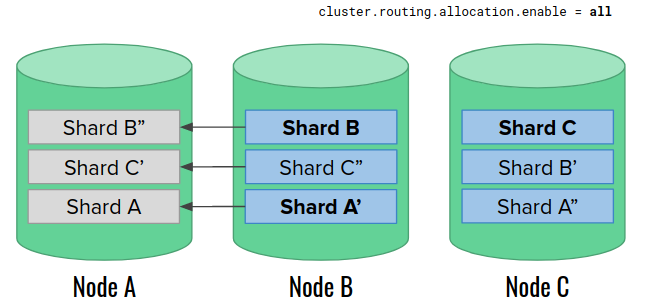
Eventually, a replacement node A’ joins the cluster. At this moment, the cluster is very unbalanced. Elasticsearch allows choosing one of several rebalancing strategies that can help in this case. Let’s assume that we have such a strategy in place, so that we can spread shards more evenly once an empty data node joins:
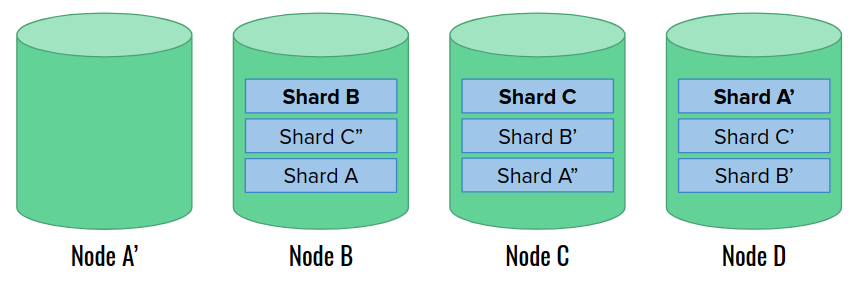
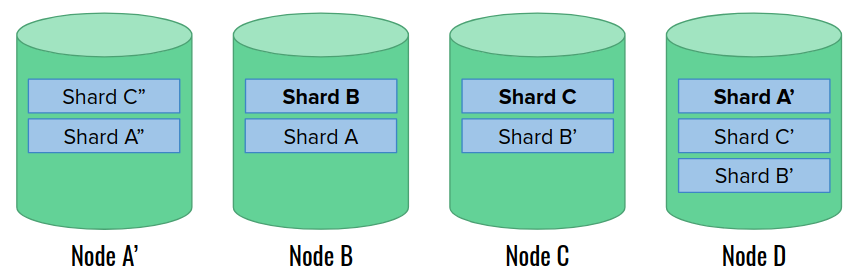
Finally, the cluster recovery is finished. The only trace of the incident is the different arrangement of primary shards.
Case 2: data node restart
By default, Elasticsearch treats every node disappearance as a potential data node failure. What to do, if we want to make a planned restart? There is a special procedure that we need to follow – it prevents the unnecessary recovery in case that we know that the node will join back shortly. To perform a safe node restart, we need to do 3 things before doing so:
- disabling shard allocation within the cluster (
cluster.routing.allocation.enable = primaries), - stopping the indexing and flushing the indices,
- stopping ingest and machine learning operations.
Let’s stop for a moment at the first point. If we know that node would return in a couple of minutes, we don’t want Elasticsearch to reallocate the replicas. The cluster-level option cluster.routing.allocation.enable controls which types of shard allocation are possible. The value “primaries” permits allocating new primary shards, and making primary shard promotions (e.g. to allow creating new indices), but disables removing or creating any replicas. It is also possible to set it to “none“, but in this case an attempt to create an index in this state would turn the cluster health immediately to RED.
In short…
Do not use the “none” setting for cluster.routing.allocation.enable during restarts – it prevents creating indices and promoting new primary shards, effectively stopping the cluster.
Scenario
Let’s use 4 data nodes again. The initial state is very similar to the previous example, with one exception that the shard allocation settings are set to “primaries“:
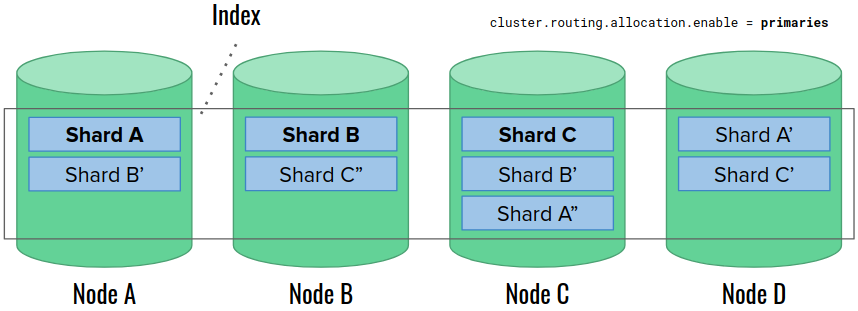
We restart the node A. The settings permit promoting a new primary shard A to replace the missing one. However, Elasticsearch does not take any further actions this time. Especially, it does not rebuild missing replica shards on the available nodes.
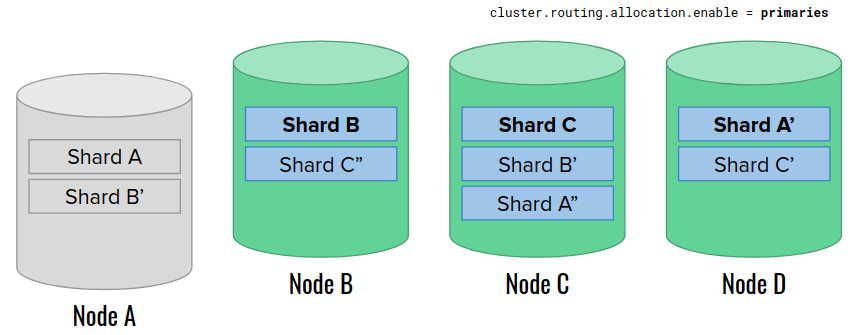
After a moment, the node 1 goes back online. The replicas cannot join yet due to the shard allocation settings.
Eventually, we change the shard allocation settings back to “all”. The replicas join the cluster, their state is synchronized, and the cluster is in GREEN state again. The only trace of the restart may be the different arrangement of primary shards.
Case 3: data loss during restart
Is it possible to loose the data during restart? If we don’t follow the procedure, yes – it can turn into a data node failure! The situation shown below is inspired by an actual failure I investigated. We try to perform the rolling restart of all data nodes, however we make two mistakes:
- leaving shard allocation settings unchanged,
- updating replica counts, whenever the node goes down.
The second point does not appear in any Elasticsearch guidelines – someone simply thought it would be a good idea to do so. However, we will shortly see that it leads to a disaster!
Scenario
This time, we’ll start with three data nodes, and we’ll be restarting them one by one:
Before the restart, we do not change the cluster allocation settings, and additionally, we decrease the replica counts on indices by 1. At this moment, Elasticsearch may choose to remove the replicas on the unavailable node, because it’s the easiest thing to do. One might ask – how is it possible to delete something on a missing node? Let’s remember that the shard allocation is managed by the master node (not shown here), not by data nodes. The master node simply updates its own metadata about the cluster, and it can do it regardless of the data node state.
When the node A returns, it discovers that it is empty. Shortly after that, we increase the replica count to 2. Elasticsearch responds with creating extra replicas on the node A (the only available). Then, it starts rebuilding them. For large data volumes, this process is lenghty and slows down the cluster.
Before we finish rebuilding the replicas, we repeat the steps for node C. As a result, we delete replicas on that node, too, and start rebuilding them from the last remaining copies on node B. The cluster experiences even more load.
Finally, we repeat the process for the node B. Unfortunately, this is also the last node that still holds the complete data. By decreasing the replica count again, we effectively remove them. Now, after this node joins, we don’t have any more copy to rebuild the replicas on any node. The index is corrupted.
In short…
Always follow official procedures and do not introduce any extra steps, unless you know what you are doing. Especially, don’t try to “improve” Elasticsearch’s actions.
Summary
The insights into the data node failures are quite easy to learn, if we understand a couple of basic rules. Unfortunately, many people (including me) learned them in a painful way by watching their production clusters die. However, I hope that this series helped you understanding what happens under the hood, and that it would save your cluster one day.